Quantcast
Channel: reports – The Marks Group | Small Business Consulting | CRM Consultancy
Viewing all 12 articles
Browse latest View live

QuickBooks: Contributed or Custom Reports

$
0
0

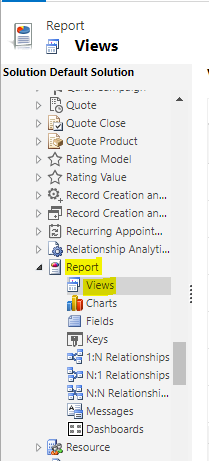
QuickBooks provides many preset reports that focus on all aspects of your business finances. There are also reports that have been created as custom reports by users. Often the users will submit the report to Intuit, and if Intuit believes it to be a benefit to all users, they will include it in the Contributed Report section.
When thinking about reports, consider the ultimate desired goal, and then go to the Reports Center to see what is available.
– Browse through report categories and the related reports for each category.
– Search for a report based on words found in its title or description.
– Learn what a report will tell you by viewing sample report images and report descriptions.
– Create and memorize your favorite reports to easy use again.

When should you consider creating a custom report?
– You can’t find an existing report that meets your needs.
– You can’t customize an existing report enough to suit your needs.
– You can’t find an appropriate contributed report.

Before creating a custom report, decide whether you want a list of transaction details or just a summary. For example, do you need a list of checks, paychecks, and bill payments that haven’t been reconciled, or do you just need the total amount of uncleared items? If you need a list, create a custom transaction detail report.

Choose Reports – Custom Reports – Transaction Detail.

This report lists individual transactions, showing each account involved in a transaction on a separate line. For example, a check written to the telephone company would have two lines in the report: one showing that the check was written from your checking account, and another showing that you assigned the amount of the check to your telephone expense account.

To open any of the transactions listed, double-click the transaction’s entry in the report.

If you just want a summary, create a custom summary report

Choose Reports — Custom Reports – Summary.

You use this report to create customized income statements that show the profitability of some aspect of your business. The result is similar to a standard profit and loss report, but unlike a profit and loss report, a custom report can show you the bottom line profitability of jobs, items, or classes.
When you create this report, the Customer Summary Report window appears. You can choose how you want the report to break down the profit and loss data using the From the Row Axis drop-down list. For example, click the Row Axis drop-down list and choose Job to change the report to show your profit or loss for each job on your Customers & Jobs list.

To see a list of the transactions that make up an amount, double-click the amount.

The post QuickBooks: Contributed or Custom Reports appeared first on The Marks Group | Small Business Consulting | CRM Consultancy.


QuickBooks: Format and Memorize

$
0
0

When I run my Customer Open Balance
report I have to drag the diamonds to change the column widths since they are
not wide enough.  I run this report on a
weekly basis and I have to change the column width every time.  Is there a way to permanently change the
column widths?  
Yes. The next time you run your
Customer Open Balance report, format the column width to your liking and
memorize the report.  Going forward you
should use the Memorized Report and it will have the correct column width each
time, all you have to do is change the date.

The post QuickBooks: Format and Memorize appeared first on The Marks Group | Small Business Consulting | CRM Consultancy.

QuickBooks: User Reports

QuickBooks: Organizing Memorized Reports

$
0
0

I am a
believer in Memorize as much as possible – including reports. But, if your
reports are not in an order or titled in a way that makes sense – you will
spend just as much time looking for a report as you may in creating it from
scratch. 
Here are some
thoughts.
Set up your
customized groups
–       Weekly Reports
–       Monthly Reports
–       Special Reports
If
you want to create these so they are at the top of the list… put an “AAA” or
something in front of them. QuickBooks works in alpha order.
Now,
for the reports themselves, remember that consistency works best and helps you
to remember – so follow this example for something that may be in Weekly and/or Monthly
reports:
–       Weekly sales – Rep A
–       Weekly sales – Rep B
–       Weekly sales – Rep C
Monthly
commission report
–       Commission – Rep A
–       Commission – Rep B
–       Commission – Rep C

The post QuickBooks: Organizing Memorized Reports appeared first on The Marks Group | Small Business Consulting | CRM Consultancy.

QuickBooks: Report showing credit card charges with associated company/job

$
0
0
I am trying to reconcile the credit
card charges entered YTD to make sure everything has been associated with a job
and add a job when one has not been noted. I have tried several different reports
but even after customizing them there is no field where I can include the
customer/job. The only way I can see the job is to open each charge entered. Can
you help me?
Try a Custom
Transaction Detail Report. Under Reports/Custom Reports/Transaction Detail click
on Display and check type, date, number, name, item, account, split, debit,
credit, balance.
Then filter
transaction type by credit card charges. This will show the debit and credit
side of each transaction but you can further filter how you want to see it.

With this report you will see the job in the name
column on the second line of the transaction. If there is no job associated
with the transaction it will just show the vendor name again.

The post QuickBooks: Report showing credit card charges with associated company/job appeared first on The Marks Group | Small Business Consulting | CRM Consultancy.

QuickBooks: Posting Transactions – Date Sensitivity

$
0
0
QuickBooks automatically
prefills the date field in every transaction and report you create. In many
cases, the date that QuickBooks prefills is not the date you want or need.  Therefore, you should always verify that the
date specified by QuickBooks is the correct date for the particular transaction
or report.
 Additionally, you should verify
that you are not posting transactions to a date in a period that has been
“closed”.  Unfortunately, QuickBooks allows users to post new transactions
to a prior period if they have access to change or delete transactions recorded
before the closing date.
Report Dates
Every QuickBooks report automatically
specifies a default date range each time the report is created. You should
always verify that the default date range is correct.
You can change the date range by:

  • Selecting a different
    preset date range (e.g., today, this month, this fiscal quarter, this fiscal
    year-to-date, last fiscal year, etc.) from the “Dates” drop-down list at the
    top of the report.

  • Entering a time period
    not specified by one of the preset date ranges in the “From” and “To” fields at
    the top of the report, by entering the dates manually or by clicking the
    calendar symbol to the right of the dates and then clicking the arrows on the
    calendar to select the applicable month and year and then clicking on the
    applicable day.

NOTE:  You should click the
“Refresh” button at the top of the report after changing the date range.
You can choose a personal preference
that automatically refreshes reports. To turn this preference on, select
“Preferences” from the “Edit” menu. Select the “My Preferences” tab under
“Reports & Graphs” and then select “Refresh automatically.”
Check Dates 
QuickBooks allows users to pay bills
or write checks on a particular day but not print the checks until a subsequent
day.  When you print the check on a later date, QuickBooks automatically
prints the payment date specified in the “Pay Bills” window or the date
specified in the “Write Checks” window as the check date.

To
print the date that the check is actually being printed you can select
“Preferences” from the “Edit” menu and then select “Checking” from the
“Preferences” scroll box. You should then check the “Change check date when
check is printed” box in the “Company Preferences” tab.

The post QuickBooks: Posting Transactions – Date Sensitivity appeared first on The Marks Group | Small Business Consulting | CRM Consultancy.

QuickBooks: Tracking Timesheet Hours vs. Hours Invoiced

$
0
0
I’m looking for a report that I can use to compare hours
reported on timesheets (hours that have been paid out) and the hours that have
been invoiced/ paid for.
I’ve also noticed it’s possible to add time to timesheets
that have already been billed.  Is there a way that I can prevent this
from happening?
Thanks for your help.
The following reports should
give you the information that you want: 
 
The Time by Job
Detail Report which is available in all versions (Pro, Premier, and Enterprise).  You access it from the Reports menu ->
Jobs, Time & Mileage.  If you don’t see a Billing Status column, click
the Customize Report button and on the Display tab, check Billing Status. Once
the Billing Status column has been activated you can tell if the time is
billable, not billable, or has been billed.
If you are using the
Premier Contractor or Enterprise Contractor versions, check out the
Billed/Unbilled Hours by Person and Job Report; access it from the Reports menu
-> Contractor Reports.  This report is very easy to read as it has
columns for Billed, Unbilled, and Not Billable.
As you noted, it is
possible to add more hours to a timesheet after you’ve created paychecks and
after you’ve pulled unbilled time into customer invoices.  This feature
has its good and bad points. It’s great if you discover that you didn’t enter
all of an employee’s time and shorted him/her in their paycheck and want to get
those missed hours into your job costing reports.

 
As for preventing someone’s ability to enter time after the fact, in Pro
or Premier you can edit various user accounts and on the Time Tracking window,
set their status as No Access – this means the user in question would not be
able to access any of the time tracking functions at all – including the
ability to create reports (so you do want to be careful with these
settings).  Another approach is to set a closing date password after
you’ve pulled billable time into Invoices.  That way, you would be the
only one who could modify any existing timesheet entries by providing the
closing date password.

The post QuickBooks: Tracking Timesheet Hours vs. Hours Invoiced appeared first on The Marks Group | Small Business Consulting | CRM Consultancy.

QuickBooks: List of Customers based on add date

$
0
0
“How
can I get a list of customers that I’ve added to my QuickBooks company file for
a specific time period?”
When you add a new customer to
your QuickBooks company file, QuickBooks stores a time created field to
the record. That’s great! However, as far as I can tell, there is no QuickBooks
report that lets you include this information
.
Here is a GREAT solution:  enter a start date in the Job Info
tab in the customer record
  • ·        
    Customer
    List
  • ·        
    Edit
    Customer
  • ·        
    Job
    Info Tab
  • ·        
    Job
    Status – Start Date
 You can then create a Customer
Contact List
report, adding the job start date.
  • ·        
    Reports
    – List – Customer contact list
  • ·        
    Customize
    report button
  • ·        
    Display
    tab – select the start date in the column option
  • ·        
    Sort
    by date (ascending or descending – your choice)
  • ·        
    Select
    OK
You can then filter for any
range of dates that you wish using the customized report button and the Filter
Tab.

The post QuickBooks: List of Customers based on add date appeared first on The Marks Group | Small Business Consulting | CRM Consultancy.


Salesforce – Creating Reports

$
0
0

You should be familiar with the Reports tab, if not its along the top as a tab. Once there you can click on New Report and you will see the following screen. Here you can select which Objects you would like to report on, you can see a few examples below. You can only report on Objects that are related to one another, if you cannot find the particular report you would like to work on then its you should ask your administrator.

Once you have selected your report and hit next you will see the report screen. Once you understand what the different sections of this screen do, its easy to create a report in less than 5 minutes and give you exactly what you are looking for. 

1. The first section is straightforward. This is a list of the available fields that you can report on from your selected objects. You can drag and drop these fields into different areas on the report page to add in filters and columns.. The icons next to the fields indicate what kind of field it is. The “a” represents text, the “#” a number and the calendar symbol is a date/time field.  If you cannot find a particular field then you might not have permissions to view it or you might need to ask your administrator. 
2. The second section is the filter section. This is where you can filter your report to only show the records that you need. We’ll use Opportunities as an example as this has the most variables. In the image below you can see the different filters available, from the drop down this is where you can filter whose records you see; everyone’s, your teams or just your own. You can also filter by Probability Percentage, for example below or above 80%.  Also Opportunity Stage (Open, Closed, Closed Won) you can also drag and drop Opportunity Stage into the section below if you want to report on more stages. Lastly you can report on the date ranges. You have two choices here, a fixed value which you can input manually or create a report, which is a bit more dynamic, if you click on the drop down which in the picture has Current FQ you can choose between values like Today, Yesterday, Last Week, Month, Year.
3.  This is the preview section. This area will give you a preview of your report if it is over 50 records, if it’s fewer than 50 records it will pretty much show you your whole report. You can interact with the preview area by dragging and dropping fields in from section 1 in the place where you would like them to appear. You can also interact by the fields by hovering over them and clicking the drop down menu, here you can sort the fields, group the fields and also summarize.
There are four types of reports you can create in Salesforce; Tabular, Summary, Matrix and Joined Reports.  
Tabular – The images in this post have all been from a tabular report. This is the simplest of reports and is suited to just showing lines of data and nothing else. 
Summary – Summary reports are probably the most commonly used and are great for showing groups of data. For example, if you want to see your recent account opportunities they will be grouped by account and you can see each opportunity under the account. From then you can do calculations, you can see the total amount of sales under an account, you can see the maximum, minimum and also average amount. 
Matrix – Matrix reports are very similar to Summary but they allow you to group by rows as well as columns to see different totals. Matrix reports aren’t commonly used unless you have to display lots of complex data. 
Joined Reports – Joined reports allow you to create two separate reports so that you can compare data. 

The post Salesforce – Creating Reports appeared first on The Marks Group | Small Business Consulting | CRM Consultancy.

Dynamics 365 – Changing Default Filters on Existing Reports

$
0
0

It’s actually possible to change the default filter on a report after it’s been created, but the feature is tucked away and easy to miss! I usually work with reports from the Advanced Find window (below), but you do not have the option to update the default filter using this method!

Instead, navigate to your reports by going to Sales -> Tools -> Reports:

Select the report you wish to edit, then click Edit Default Filter:

Make your updates to the filter, then click Save Default Filter:

That’s it! You’ve updated the default filter on a report. Be advised– when you run a report from a view and select “All records on all pages in the current view”, that will override the default filter and use the selected View as the filter:

The post Dynamics 365 – Changing Default Filters on Existing Reports appeared first on The Marks Group | Small Business Consulting | CRM Consultancy.

Dynamics 365: Create Custom Report Categories and Views to Organize Reports

$
0
0

It’s time for some spring cleaning! The reports area of Dynamics is often left unorganized, making it a chore to locate particular reports. In this post, you’ll learn how to create a new report category, then a new system view to further organize your reports.

Once you have a new report category in mind, head to Settings–>Administration–>System Settings:

Select the “Reporting” tab:

You’ll see the out-of-the-box report categories listed here.  There are many out-of-the-box reports using these, so keep that in mind if you decide to rename the existing categories.  We’re going to add “HR Reports” to this list by selecting “Add”:

Enter your new category, then select OK:

You can rearrange the categories by selecting “Move Up”, “Move Down”, or Sort Ascending/Descending. Select OK when finished.

Now that a new category has been created, open the default solution by going to Settings–>Customizations–>Customize the  System.  Expand “Entities”, then find “Report”, then select “Views”:

Open “Administrative Reports”, then select “Save as”:

Give the new View a name (in this case, HR Reports). Since we made a copy of an existing report, select “Edit Filter Criteria” and update the report category:

Select OK, then save & close the view. Publish all customizations.  Now, you can head back to your reports area and categorize reports as needed–select the report, then “Edit”, then select the appropriate categories.


The post Dynamics 365: Create Custom Report Categories and Views to Organize Reports appeared first on The Marks Group | Small Business Consulting | CRM Consultancy.

Viewing all 12 articles
Browse latest View live


Latest Images